Email Manager - ADMINISTRATION |
HOME |
Drop FoldersDrop Folders allow clients to import recipient lists into Email Manager using FTP. This is an alternative to importing lists through the List Manager module, and is useful in, but not limited to the following scenarios:
Additional features include, but are not limited to:
Setting Up a Drop Folder
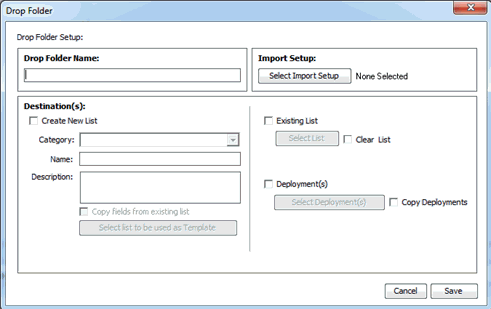
A separate drop folder is typically created for each type of recipient list that will be imported into Email Manager. Each drop folder is associated with a list import source.
Import SetupList import source defines the format and data mapping to be automatically performed when a list is uploaded into the FTP drop folder. For example, list import source has information about the format, compression, encoding, delimiter, text qualifier and field mapping of the recipient list(s) which can be uploaded to the folder. The metadata of the inbound source file must match the import source associated with the drop folder to which is it being uploaded.
There are two options:
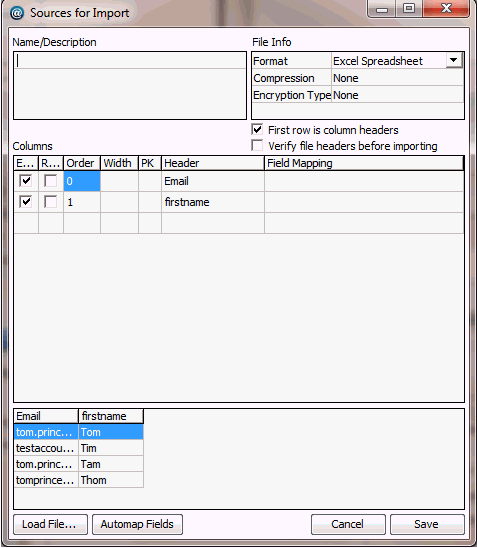
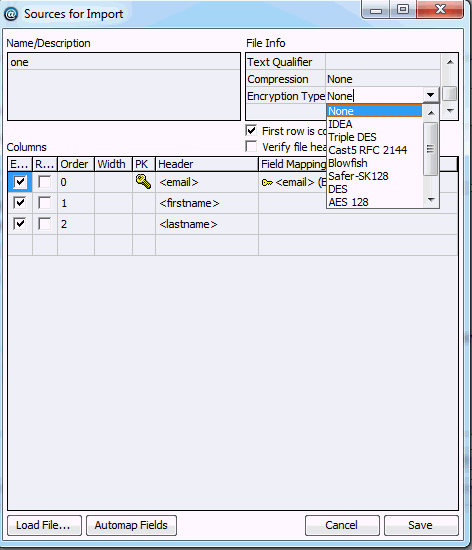
From the list of previously configured import sources select one and click Select. To make changes to the setup, for example changing the primary key or changing a field mapping, click the Edit icon. The edit screen is also where File Encryption settings are managed.
Instead of selecting
an existing source list, click the The Sources for Import screen will now open with your newly created list format. A primary key of the file will need to be indicated by clicking in the PK column next to the field that will be your primary key. A yellow key icon is now displayed. Click Save to take you back to the Sources for Import screen, then click Select with the required Import Source selected. The following file types can be imported into Drop Folders:
DestinationsDestinations define where and how the inbound file is stored in Email Manager. There are three options available to define the import destination:
Once Drop Folders have been configured, you can transfer list files via the Email Manager FTP service using a standard FTP client, such as FileZilla. Use the appropriate FTP URL for your account (see table below) and your existing EM account username and password.
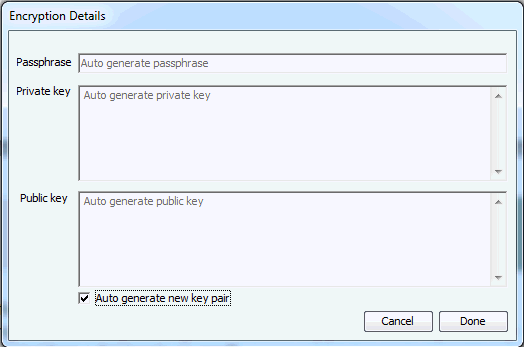
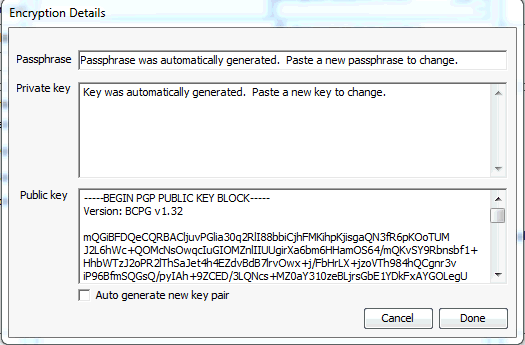
Drop Folder File EncryptionTo fully secure the transfer of data file it is possible to use drop folders to transfer files that have been encrypted using one of several industry standard formats. This system uses a system of public and private keys to enable the encryption and decryption process. These keys can be generated by the third party encryption utility and imported into EM, or EM can generate its own set of keys. This functionality is accessed via the Select Import Setup button on the Drop Folder configuration screen.
To let EM generate its own set of keys, select the Auto generate new key pair check box and click Done. Save the Import Source. When you open the Encryption Details screen again you will see that the required keys have been generated.
Alternatively you can paste a third party private key and passphrase into the relevant fields. Click Done and save the import source. You can paste a new passphrase at any stage, or select the Auto generate new key pair check box to overwrite with an EM generated key pair. The Drop Folder has now been configured for use with encrypted files, and can be used as normal with Email Manager decrypting the files automatically.
Editing Drop Folders
|
|
|
© Alterian. All Rights Reserved. | Privacy Policy | Legal Notice |   
|
 button under Select
Drop Folder Category, enter a category name and click the
Create button.
 icon to browse to a file with the desired format
select it and click Open. The File Settings screen opens where
you can amend settings such as File
Format, Field Delimiter and Text
Qualifier. This page also has a First
row is column headings check box.
 button
under Select Drop Folder.